Atomic Force Microscope
Contents
Atomic Force Microscopy
(AFM) also known as Scanning Force Microscopy (SFM)
Theory
The resolution of the AFM is 1000 times better than an optical or light microscope which is limited by the wavelength of light. The AFM can resolve images to within a fraction of a nanometer. We use the MadcityLabs Nano-OP Series nano-positioners. They have a range of motion up to 65μm, and a resolution of .13nm (.00013μm). The Resonant Frequency of the apparatus is 4kHz ± 20%, alowing up to a 1kg sample vertically.[1]
Non-Contact mode
Our AMF works without coming in physical contact with the sample, commonly refereed to as non-contact mode. the cantilever oscillates near the resonant frequency, with an amplitude of <10nm due to van der Waals forces operating within 1-10 nm above the surface of the sample.This interaction decreases the resonance frequency of the cantilever and adjusts the tip-to-sample distance. This provides a surface map of the sample. Because the tip does not physically touch the sample but relies on the intermolecular forces between the atomistic tip and the sample. This allows for the imaging of delicate, soft, wet and even still living samples and as such is used in a variety of disciplines.
Apparatus
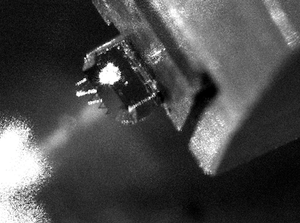
The AFM consists of 6 major parts. The apparatus includes a laser mounted vertically pointing down on the a platform mounted a PTZ scanner, or nano-drive, and a photodetector positioned to receive the reflected laser beam. The Probe is mounted above the platform where the sample surface lies, and contains a cantilever and tip which interact with the sample surface reflecting the laser beam into the photodetector.
As can be seen in the image of the Advanced Project Lab’s AFM, the Lab’s apparatus consists of a substructure containing 3 axis piezo nano-drives in the x, y, and z directions in addition to a macroscale z axis platform allowing for precise positioning of the sample along the z axis before running a precise xy grid for scanning. Above the sample platform is the probe, mounted in the tip holder embedded into the apparatus substructure, the cantilever is mounted to the bottom of the probe, and the atomistic tip is mounted to the cantilever. Above and to the right of the probe is the photodetector which measures changes in the laser position which is then fed to the detector and feedback electronics; not pictured here, embedded in the computer tower. Directly above the probe is the laser, mounted on its own apparatus and attached to the AFM apparatus structure. The laser is mounted to 3 axis coarse adjustments in the x, y and z. By adjusting the z position of the laser the diameter of the laser beam as it hits the cantilever can be adjusted to be within the diameter of the cantilever (~.6μm), by adjusting the xy directions the laser beam can be aligned to lie on the cantilever as well as adjust the resolution of the reflected laser beam into the photodetector. Notice the camera mounted outside of the AFM apparatus which allows for a magnified view of the apparatus in particular the intersection of the laser beam and cantilever allowing for precise alignment of the laser onto the cantilever. an additional camera placed to view the reflected beam as it hits the photodetector allows for the alignment of the photodetector with the reflected beam which is adjusted manually.
Michelson Interferometry
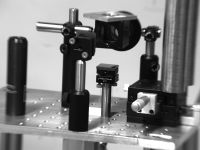
As part of the ongoing project to accurately determine the scale and range of the AFM a side project was retrofit the AFM as a Michelson Interferometer. As you can see in the image of our newly constructed Michelson interferometer there were a few structural changes made to the AFM to further increase it's accuracy. This included a change in laser, as well as an adjustment made to the AFM platform itself enabling further interface in the AFM's set up.
Interferometry uses the know principle of wave interference to accurately determine distances traveled on the nano scale. Wave interference occurs as allowing use to accurately measure the difference between a light fringe and a dark fringe.
For the purpose of our experiment moved the AFM scanning platform up in increments as reported by the FPGA, and the compared that number of steps to the distance traveled moving from one light fringe to another. This gave us a measure of the distance traveled in nm by the piezomotor as moved though the FPGA.
Coding Aside
Another important change to the AFM has been in the computer interface. Our AFM is controlled by a Field Programable Gate Array (FPGA) manipulated though LabView software.


