Difference between revisions of "Fiber Optics"
| (10 intermediate revisions by the same user not shown) | |||
| Line 1: | Line 1: | ||
| + | |||
| + | == Fiber Basics == | ||
| + | |||
| + | [[File:Fiber_connectors.png|600px]] [[File:OF.jpg|300px|right]] | ||
| + | |||
| + | [[File:Fiber_mating_sleeves.png|600px]][[File:Fiber.3.gif|right]] | ||
| + | |||
| + | [[File:Dc.png|800px]] | ||
| + | |||
| + | |||
| + | == Connectorizing optical fiber == | ||
| + | '''Remember to practice safety when breaking fiber and handling broken ends: wear safety glasses and tape up ends''' | ||
| + | |||
| + | The following list discusses the highlights of connectorizing fiber. Consult Thorlab's [[Media:FN96A-Manual.pdf| Fiber Polishing and Connectorization Manual]] for a more complete description. | ||
| + | <ul> | ||
| + | <li> Strip coating from fiber, leaving 2-3 inches of bare fiber </li> | ||
| + | <li> Prepare epoxy (EpoTek 353ND, mixing ratio 10:1 A:B by weight) </li> | ||
| + | <li> Inject epoxy into connector </li> | ||
| + | <li> Insert bare fiber through ferrule and cure epoxy (20 min @ 120 C, or level 6 on our oven) </li> | ||
| + | <li> Use diamond tipped blade to score and cleave fiber just above epoxy bead </li> | ||
| + | <li> Hand polish tip until fiber is flush with epoxy </li> | ||
| + | <li> Polish using abrasion sheets and polishing puck: 30um (green), 6um (yellow), 3um (red), 1um (white) </li> | ||
| + | </ul> | ||
| + | |||
| + | |||
| + | |||
| + | '''Some useful fiber polishing pictures''' | ||
| + | |||
| + | [[File:Insert_epoxy_in_fiber_connector.jpg|200px|thumbnail|insert epoxy in connector|left]] [[File:Fiber_polishing_progression.jpg|360px|thumbnail|polishing progression|center]] | ||
| + | [[File:Perfect_fiber_polish.jpg|right|360px|thumbnail| perfect fiber polish|right]] | ||
| + | [[File:Fiber_connector_endface.jpg|left|300|thumb| polishing picture guide|upright=2.5]] | ||
| + | [[File:Fiber_connector_endface_pics.jpg|250|thumbnail|cleans vs dirty fiber connectors|upright=3|right]] | ||
| + | |||
| + | |||
| + | |||
| + | |||
| + | |||
| + | |||
| + | |||
| + | |||
| + | |||
| + | |||
| + | |||
| + | |||
| + | |||
| + | |||
| + | |||
| + | |||
| + | |||
| + | |||
| + | |||
| + | |||
| + | |||
| + | |||
| + | |||
| + | |||
| + | |||
| + | |||
| + | |||
| + | |||
| + | |||
| + | |||
| + | |||
| + | |||
| + | |||
| + | |||
| + | |||
| + | |||
| + | |||
| + | |||
| + | |||
| + | |||
| + | |||
| + | |||
| + | |||
| + | |||
| + | |||
| + | |||
| + | |||
| + | |||
| + | |||
| + | |||
| + | |||
| + | |||
| + | |||
| + | |||
| + | Other useful links: | ||
| + | |||
| + | [http://en.wikipedia.org/wiki/Optical_fiber Optical Fibers - Wikipedia] | ||
| + | |||
| + | [http://en.wikipedia.org/wiki/Double-clad_fiber| Double-Clad Fibers - Wikipedia] | ||
| + | |||
[http://www.rp-photonics.com/passive_fiber_optics.html?s=spotlight RP's Passive Fiber Optics Tutorial] | [http://www.rp-photonics.com/passive_fiber_optics.html?s=spotlight RP's Passive Fiber Optics Tutorial] | ||
| + | |||
| + | [http://www.rp-photonics.com/tutorial_fiber_amplifiers.html RP's Fiber Amplifiers Tutorial] | ||
| + | |||
| + | [http://www.rp-photonics.com/tutorial_modeling.html?s=spotlight RP's Modeling of Fiber Amplifiers and Lasers Tutorial] | ||
Latest revision as of 11:14, 12 November 2015
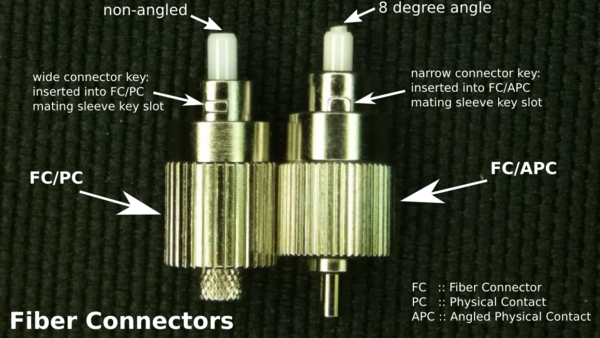
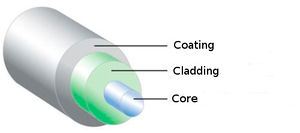
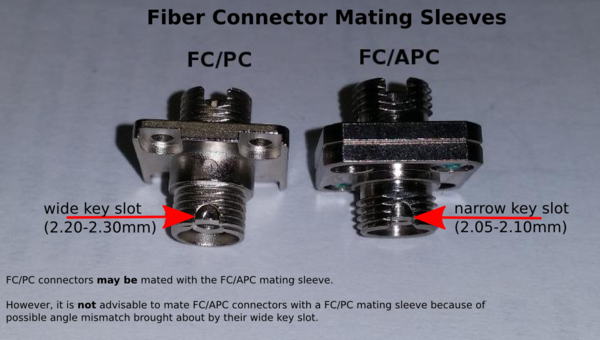
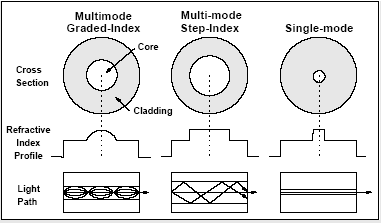
Fiber Basics
Connectorizing optical fiber
Remember to practice safety when breaking fiber and handling broken ends: wear safety glasses and tape up ends
The following list discusses the highlights of connectorizing fiber. Consult Thorlab's Fiber Polishing and Connectorization Manual for a more complete description.
- Strip coating from fiber, leaving 2-3 inches of bare fiber
- Prepare epoxy (EpoTek 353ND, mixing ratio 10:1 A:B by weight)
- Inject epoxy into connector
- Insert bare fiber through ferrule and cure epoxy (20 min @ 120 C, or level 6 on our oven)
- Use diamond tipped blade to score and cleave fiber just above epoxy bead
- Hand polish tip until fiber is flush with epoxy
- Polish using abrasion sheets and polishing puck: 30um (green), 6um (yellow), 3um (red), 1um (white)
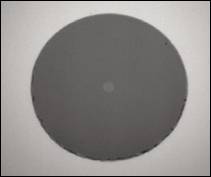
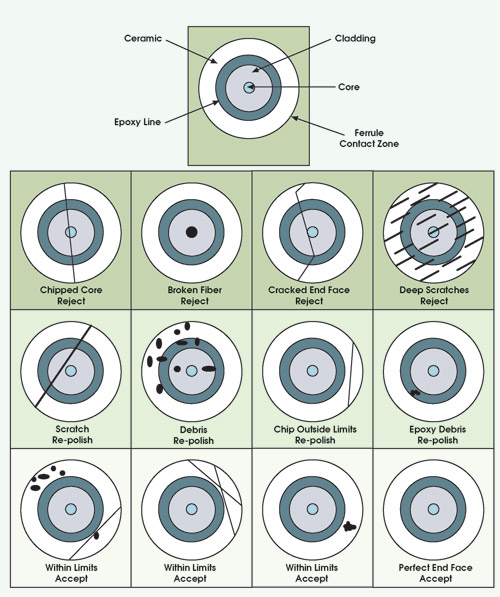
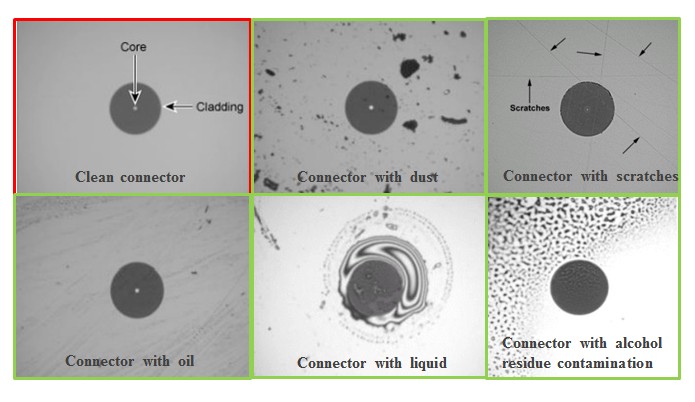
Some useful fiber polishing pictures
Other useful links:
Double-Clad Fibers - Wikipedia
RP's Passive Fiber Optics Tutorial
