Difference between revisions of "General Lab Equipment Obstacle Course"
(→Multimeters) |
(→Function Generators and Oscilloscopes) |
||
| (101 intermediate revisions by 3 users not shown) | |||
| Line 1: | Line 1: | ||
| − | + | This obstacle course will give you a general introduction to a variety of important equipment in a scientific laboratory. | |
| + | While the course focuses on specific instruments available in the Advanced Projects Lab, the techniques and uses of each instrument are generally applicable to other versions of that instrument. | ||
== Multimeters == | == Multimeters == | ||
| − | + | [[File:Fluke.jpg|300px|thumb|right|Fluke 179 Multimeter and accessories ]] | |
| − | + | The multimeter module will introduce you to use of a Fluke 179 Multimeter (pictured to the right). It will cover the following topics: | |
| − | <ul> | + | <ul> |
| − | <li> | + | <li> Measuring voltage</li> |
| − | <li> | + | <li> Measuring current</li> |
| − | <li> | + | <li> Measuring resistance and testing for continuity </li> |
| − | <li> | + | <li> Diode check</li> |
| − | <li> | + | <li> AC signals, frequency response </li> |
| − | <li> | + | <li> Capacitance </li> |
| − | <li> | + | <li> Clamp meter </li> |
| + | <li> Temperature Measurements</li> | ||
</ul> | </ul> | ||
| − | + | This module is [[Multimeters|here]]. | |
| − | + | == Power Supplies == | |
| − | |||
| − | |||
| − | |||
| − | + | [[File:Digital Power Supply Front.jpg|400px|thumb|right|digital power supply]] | |
| − | |||
| − | |||
| − | + | This module will introduce you to two types of power supplies. It will cover | |
| − | + | <ul> | |
| − | + | <li> Floating and Grounding modes</li> | |
| − | + | <li> Analog Power Supplies</li> | |
| − | + | <li> Digital Power Supplies</li> | |
| − | < | + | <li> Current and Voltage Limiting </li> |
| − | <li> | + | <li> Independent, Parallel and Series (multiplexed) modes.</li> |
| − | |||
| − | <li> | ||
| − | |||
| − | |||
| − | |||
| − | |||
| − | |||
| − | <li> | ||
| − | <li> | ||
| − | |||
| − | |||
| − | |||
| − | |||
| − | |||
| − | |||
| − | |||
| − | </li> | ||
| − | |||
| − | <li> | ||
| − | |||
| − | |||
| − | |||
| − | |||
| − | |||
| − | |||
| − | |||
| − | |||
| − | |||
| − | |||
| − | |||
| − | |||
| − | |||
| − | |||
| − | |||
| − | |||
| − | |||
| − | |||
| − | |||
| − | |||
| − | |||
| − | |||
| − | |||
| − | |||
| − | |||
| − | |||
| − | |||
| − | |||
</ul> | </ul> | ||
| − | + | The module is [[Power Supplies|here]]. | |
| − | |||
| − | |||
| − | |||
| − | |||
| − | |||
| − | == Function Generators == | + | == Function Generators and Oscilloscopes == |
| − | ( | + | [[File:FunGenAndOScope.png|300px|thumb|right|Rigol Function Generator (top) and Oscilloscope (bottom)]] |
| + | This module will introduce you to use of the Rigol DG1022 (or similar) Function Generator and the DS1102E Oscilloscope (or similar) - both pictured to the right. The following topics will be introduced: | ||
| + | Function Generator Topics: | ||
<ul> | <ul> | ||
<li> Frequency, amplitude, offset, phase </li> | <li> Frequency, amplitude, offset, phase </li> | ||
| Line 99: | Line 46: | ||
</ul> | </ul> | ||
| − | + | O-scope Topics: | |
| − | |||
<ul> | <ul> | ||
<li> Voltage/time scale </li> | <li> Voltage/time scale </li> | ||
| Line 111: | Line 57: | ||
<li> Analyzing data: cursors, averaging, math menu | <li> Analyzing data: cursors, averaging, math menu | ||
<li> Exporting data </li> | <li> Exporting data </li> | ||
| − | |||
</ul> | </ul> | ||
| + | |||
| + | The module is available [[Function Generators and Oscilloscopes|here]]. | ||
== RF Signals == | == RF Signals == | ||
| Line 122: | Line 69: | ||
<li> Splitters, mixers, and switches </li> | <li> Splitters, mixers, and switches </li> | ||
</ul> | </ul> | ||
| + | |||
| + | The module is available [[RF Signals|here]]. | ||
== Lock-in Amplifier == | == Lock-in Amplifier == | ||
| Line 129: | Line 78: | ||
<li> Use switch to turn on and off a highly attenuated signal and detect it with the lock-in </li> | <li> Use switch to turn on and off a highly attenuated signal and detect it with the lock-in </li> | ||
</ul> | </ul> | ||
| + | |||
| + | The module is available [[Lock-in Amplifier|here]]. | ||
== Frequency Counters == | == Frequency Counters == | ||
Measure the frequency of an RF source; map frequency vs. voltage curve of a voltage controlled oscillator (VCO) | Measure the frequency of an RF source; map frequency vs. voltage curve of a voltage controlled oscillator (VCO) | ||
| + | |||
| + | The module is available [[Frequency Counters|here]]. | ||
== RF Spectrum Analyzer == | == RF Spectrum Analyzer == | ||
| Line 144: | Line 97: | ||
<li> Save and export data | <li> Save and export data | ||
</ul> | </ul> | ||
| + | |||
| + | The module is available [[RF Spectrum Analyzer|here]]. | ||
== Soldering == | == Soldering == | ||
| Line 159: | Line 114: | ||
<li> Construct voltage divider on perfboard with BNC input/output connectors </li> | <li> Construct voltage divider on perfboard with BNC input/output connectors </li> | ||
</ul> | </ul> | ||
| + | |||
| + | The module is available here [[Soldering|here]]. | ||
Latest revision as of 10:45, 11 January 2022
This obstacle course will give you a general introduction to a variety of important equipment in a scientific laboratory.
While the course focuses on specific instruments available in the Advanced Projects Lab, the techniques and uses of each instrument are generally applicable to other versions of that instrument.
Contents
Multimeters
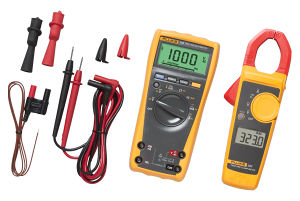
The multimeter module will introduce you to use of a Fluke 179 Multimeter (pictured to the right). It will cover the following topics:
- Measuring voltage
- Measuring current
- Measuring resistance and testing for continuity
- Diode check
- AC signals, frequency response
- Capacitance
- Clamp meter
- Temperature Measurements
This module is here.
Power Supplies
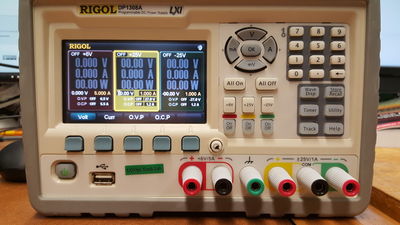
This module will introduce you to two types of power supplies. It will cover
- Floating and Grounding modes
- Analog Power Supplies
- Digital Power Supplies
- Current and Voltage Limiting
- Independent, Parallel and Series (multiplexed) modes.
The module is here.
Function Generators and Oscilloscopes
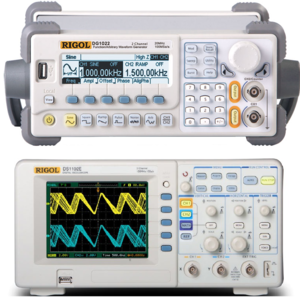
This module will introduce you to use of the Rigol DG1022 (or similar) Function Generator and the DS1102E Oscilloscope (or similar) - both pictured to the right. The following topics will be introduced:
Function Generator Topics:
- Frequency, amplitude, offset, phase
- Frequency sweep/ramp
- Sine, square (incl. TTL), triangle, sawtooth, arbitrary waveforms (possibly a demonstration of Fourier components)
O-scope Topics:
- Voltage/time scale
- Coupling
- Triggering
- Scope probes
- Termination
- Bandwidth, sampling
- Aliasing
- Analyzing data: cursors, averaging, math menu
- Exporting data
The module is available here.
RF Signals
- Measuring RF power
- Termination and impedance matching
- Attenuation and filtering
- Splitters, mixers, and switches
The module is available here.
Lock-in Amplifier
- Basic idea of operation; reason for using
- Use switch to turn on and off a highly attenuated signal and detect it with the lock-in
The module is available here.
Frequency Counters
Measure the frequency of an RF source; map frequency vs. voltage curve of a voltage controlled oscillator (VCO)
The module is available here.
RF Spectrum Analyzer
Always be careful to ensure signal input to spectrum analyzer is not too large
- What does a spectrum analyzer do?
- Attach wire-loop antenna and find radio stations
- Mix two RF signals and observe the expected spectrum
- Measuring amplitude of signal above background
- Save and export data
The module is available here.
Soldering
- Soldering technique
- Cleaning iron tip
- Heat pieces to be soldered (hot iron, short time)
- Avoid cold solder joints
- Look for shiny and smooth result
- Tools of the trade: heatshrink tubing, desoldering pump, solder wick, wire strippers, soldering gun, heat gun, rosin flux
- Solder end of DB9 cable (using only 4 or 5 conductors) to practice stripping wire, using heatshrink tubing, and creating usable product
- Construct voltage divider on perfboard with BNC input/output connectors
The module is available here here.


