Difference between revisions of "Master Oscillator Power Amplifier Pulsed Laser"
Aplstudent (talk | contribs) |
Aplstudent (talk | contribs) |
||
| Line 38: | Line 38: | ||
[[File:GrapheneCut2.jpg|300px|center]] | [[File:GrapheneCut2.jpg|300px|center]] | ||
| + | |||
| + | |||
| + | '''Put a Droplet of Isopropyl Alcohol onto the Copper Square''' | ||
| + | |||
| + | Careful not to wet the copper square, a bead is needed in order to adhere to the target substrate | ||
| + | |||
| + | Once there is a bead of Isopropyl on the copper square, lower the fiber connector slowly down to it. We used a translation stage to lower the fiber connector down slowly and smoothly | ||
| + | |||
| + | When the tip of the fiber connector breaches the top of the bead, the copper square should be sucked upward and flatten on the surface of the fiber connector tip: | ||
| + | |||
| + | [[File:GrapheneDrop.jpg|500px]] | ||
| + | |||
| + | '''Bake the Fiber Connector on a Hot Plate''' | ||
| + | |||
| + | Place the whole translation stage onto a hot plate set to 120C | ||
| + | |||
| + | Lower the translation stage so that the tip of the fiber connector is right above the hotplate | ||
| + | |||
| + | Let it bake for an hour and a half: | ||
| + | |||
| + | [[File:GrapheneBake.jpg|500px]] | ||
| + | |||
| + | '''Etch the Copper Substrate''' | ||
| + | |||
| + | Fill a glass petri dish with copper etchant (we used sodium persulphate) | ||
| + | |||
| + | Lower the fiber connector tip into the copper etchant slowly | ||
| + | |||
| + | Let it sit for an hour, and then dip the fiber connector into DI water the same way to remove excess etchant: | ||
| + | |||
| + | [[File:GrapheneEtch.jpg|500px]] | ||
Revision as of 14:00, 16 June 2015
MOPA (Master Oscillator Power Amplifier)
This fiber laser will consist of three stages:
1st: Master Oscillator (this is the stage that will contain the graphene and will produce the pulsing)
2nd: Single-Mode Power Amplifier
3rd: Double-Clad Power Amplifier
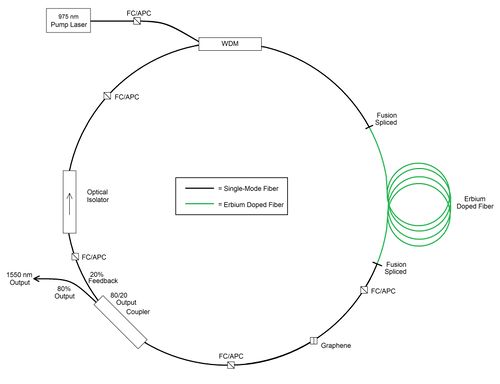
Master Oscillator with graphene as saturable absorber:
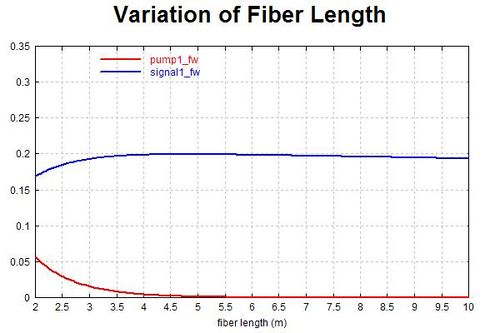
The lengths of Erbium-doped fiber are chosen based on RP Fiber Power simulation:
Application of Graphene to the Tip of a Fiber Connector
We want to use graphene as a saturable absorber for our MOPA
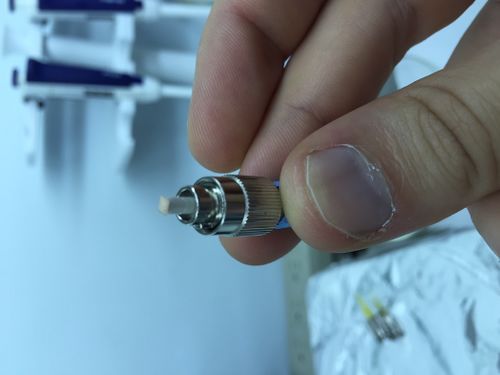
In order to do that, we need to get graphene onto the tip of a fiber connector:
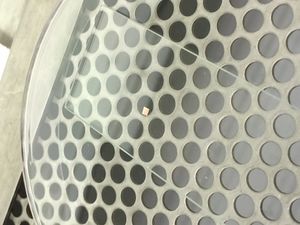
Cut Out a Small Square From the Graphene Sample
To cut the graphene sample, use an exacto blade and press firmly onto the foil, no sawing motion
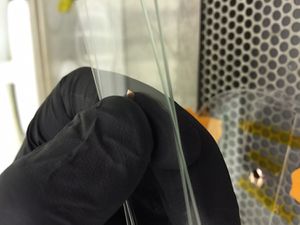
Once the small square is free, place it onto a glass slide and with another glass slide cover it
Press the two slides together to flatten the foil so that hopefully the suction in the next step will be strong enough to hold it in place
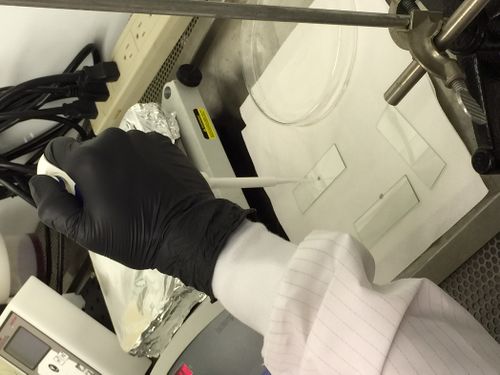
Put a Droplet of Isopropyl Alcohol onto the Copper Square
Careful not to wet the copper square, a bead is needed in order to adhere to the target substrate
Once there is a bead of Isopropyl on the copper square, lower the fiber connector slowly down to it. We used a translation stage to lower the fiber connector down slowly and smoothly
When the tip of the fiber connector breaches the top of the bead, the copper square should be sucked upward and flatten on the surface of the fiber connector tip:
Bake the Fiber Connector on a Hot Plate
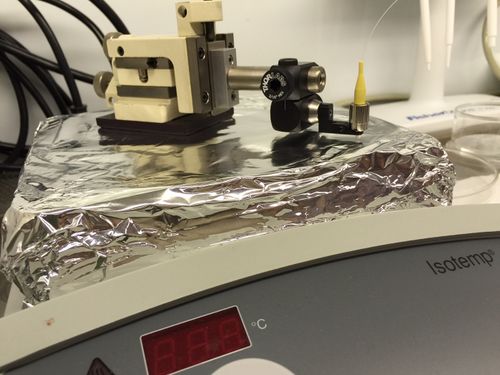
Place the whole translation stage onto a hot plate set to 120C
Lower the translation stage so that the tip of the fiber connector is right above the hotplate
Let it bake for an hour and a half:
Etch the Copper Substrate
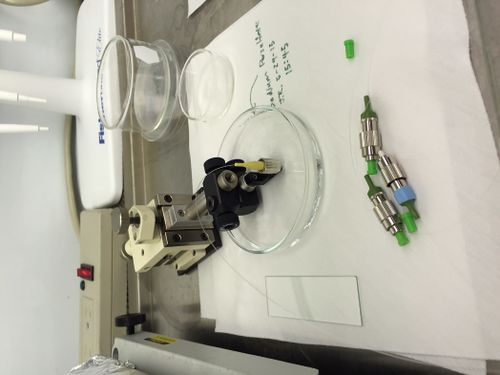
Fill a glass petri dish with copper etchant (we used sodium persulphate)
Lower the fiber connector tip into the copper etchant slowly
Let it sit for an hour, and then dip the fiber connector into DI water the same way to remove excess etchant:
